Inside Phil's Bunker
Making Keepsake Boxes
I wanted to make some small keepsake boxes as gifts for people and hit on this design as it is somewhat unique and displays a lightness that you don't always see with wood. The design uses 1/8" thick material and 1/8" box joints plus a top or front that is CNC carved. Red velvet lining in the top adds a surprise plushness.


The top could easily be inlayed, hand carved or otherwise decorated. Even nicely figured wood makes a nice top. Because of the 1/8" material, hinges were not chosen but rather a liner that protrudes about 3/16" and keeps the top aligned. This design can be changed in lots of ways to meet your needs.
There are 5 main phases to making the boxes:
-
Building the box (steps 1, 2, 3)
-
Carving and mounting the top (steps 4, 5)
-
Cutting the lid (step 6)
-
Finishing the box (not shown)
-
Making the inserts and liners (step 7)
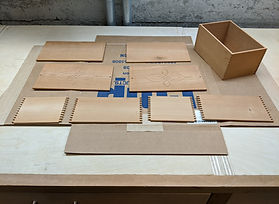
In the graphic you will see a more detailed progression.


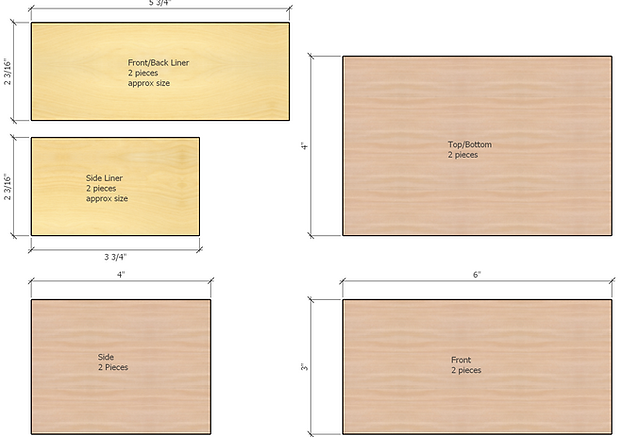
Start by cutting out the blanks for the top, bottom, front, back and sides. See the shop drawing for sizes. You may want the top to be a bit longer to allow for some sort of clamp or hold-down on your CNC machine if you go that route. You can trim the sides later with a table saw, band saw or even by hand.
Cut the finger box joints. Use a 1/8" straight or spiral bit. I use an Incra LS positioner on my router table but any box joint jig will work fine as long as it can do 1/8" fingers.

Glue up the front/back/sides. While that is drying, route the top. I used F-Engrave to generate the GCode to control my CNC router but there are plenty of options - VCarve, F360 and others.
Note the use of screws as hold-downs. If you are planning to route a design in the front, back or sides, it is best to do that before gluing them together.

When your top is done, glue the top and bottom to the previously assembled sides. Once thoroughly dry, trim the top and bottom excess and any box joint fingers that are proud of the joint. I use a router table with a bearing top trim bit and a sander. Be careful when routing the cross grain trailing corner to avoid chipout. Then sand the overall box to your finish grit.
Once you are satisfied with the sanding job, cut the lid off leaving at least 3/8" of space inside the lid to accommodate the lining you will put in. Use a careful technique for cutting off the lid. There are a number of ways to do this safely. On the table saw, I cut the sides halfway through - leaving 1/16" of wood and cut through the front and back completely. This prevents potentially dangerous binding. But, there are other safe techniques as well.
Finish cutting off the lid with either a bandsaw or by hand. I use a Japanese saw that cuts on the pull stroke as it makes for better control. Trim the remaining wood and sand both the lid and bottom flat.


Now that you have the top and bottom, you are ready to finish the box. I prefer a wipe-on oil based poly but there is no limit to the possible options. Once you are happy with the finish, move on to making the liner. I used 1/8" pine but any wood will work ok. There are lots of ways to make the mitered liners. I cut and miter each piece to fit, using a shop made sled for the router table and 45 degree champher bit. If mitering is difficult for you, you can use a butt joint and just fit the pieces in. I think the mitered corners look better however butt joints will be fine. I don't bother with glue for a mitered liner but you might want a little for the butt version.
I have a lot of left over cork shelf liner so I used that for the bottom. The wood side liners cover up the rough cut edge of the cork for a nice look.
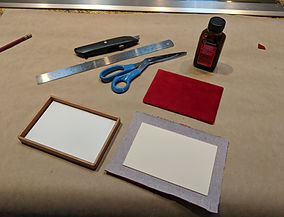
For the top liner, I used red velvet glued to leftover art matting. Any stiff card material will work. Undersize the card by a bit more than 1/16". The velvet wrapped around the edge makes for a perfect tight fit and no glue is needed. You will need to experiment with your material to get the right size.

I've made (and given) quite a few of these boxes over the years and they are always well received. I still get compliments on ones I've given years ago.