Designing a Reproduction from a Photo
- Phil Barrett
- Jan 4, 2020
- 4 min read
Updated: Jan 6, 2020
I think many of us have been in the situation where we see a photo of a piece of furniture that we would like to build but have no available plans. Or worse, a family member or spouse shows you the picture of a wildly expensive item they want to buy and you know you can make it for a lot less (and maybe justify a tool purchase or two). So, how do you go about drawing up plans to make one? Well, read on how I go about it.

Before we get into it, you will obviously need a photo. More is always better and, ideally, you will have a front view and a side view. Another need is a set of overall dimensions (HxWxD) or, failing that, a reference object that you know the size of.
Here's a photo of a table I have in my house. This is actually a fairly poor picture to work from but sometimes that's all you have. The overall dimensions are 26W, 25H and 17D.

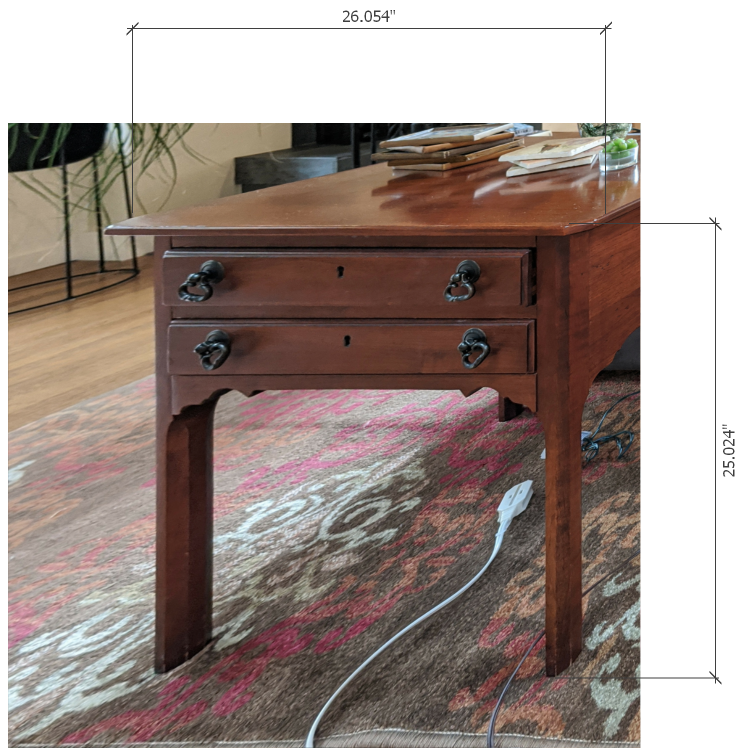
So, the first thing to do is create a perspective adjusted view of the front of the object. There are lots of photo processing applications that can do this. I use DxO PhotoLab (paid product) but lots of others do this too as can GIMP, a free product. I won't go into the details of how since every application is different but you will wind up with something like the photo to the right. Yes, it looks bizarre but the left and right legs are the same height and the legs are parallel. You can skip this step if you have photos that are square on with the front or side and show little perspective distortion.
The next thing to do is to import the corrected image into your CAD software and scale the image to be the correct size. I use Sketchup for this but there are many CAD packages that will work. Using the dimension tool, I pick representative height and width features. Then, using the scale tool, I adjust the size of the image so the dimensions are correct. In the example, I've made the table 25.024 inches high and 26.054 inches wide. The reason the measurements are exact has to do with the way scaling works in sketchup but it doesn't matter as you will soon see. You may need to separately scale X and Y depending on how good your photo software is.

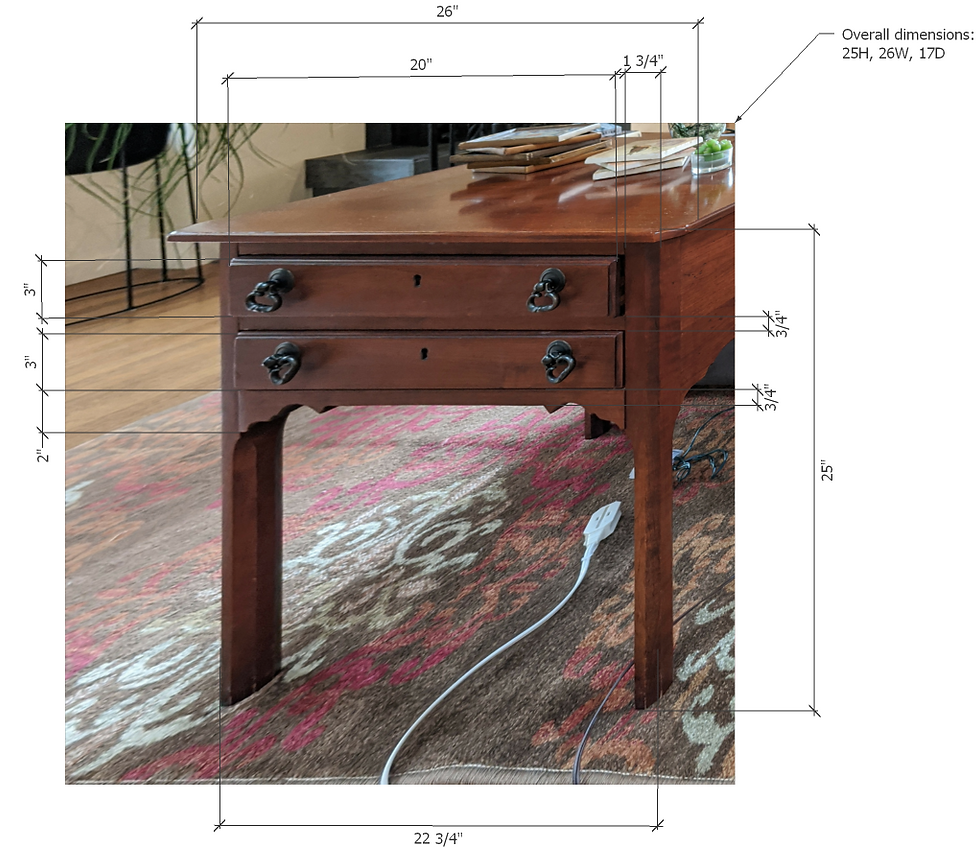
Next, I add dimensions for all of the important features of the "face plane". It can be tricky to get exact dimensions and you sometimes have to guess at where something begins or ends but these are going to be approximate anyway and we will be tweaking them along the way.

One you have all the important features dimensioned, you need to normalize them. This is where you apply logic and knowledge of standard dimensions to get the plan to make sense. Note that I have modified height and width to be 25" and 26", respectively. The leg posts were 1.827" which is very close to 1 3/4", the typical dimension of a 2x2 so I set the size to that. The drawers are 20.153" which I changed to 20", a fairly standard drawer size. The rail between the drawers is 0.741, so I made it 3/4". And so on.

The skirt detail below the drawers is interesting and we can trace an outline of it for use in making a template. I usually create a template to use a router with a trim bit. Then it is very easy to make all the profiles look identical. It is common to have profiles like these made up of simple arcs and straight lines and the original designer usually repeated the same design in multiple places. As long as you are close, the profile will turn out pretty good. I made the traced profile a closed loop and create an object so I can reuse it in a number of places.

At this point, there is enough information to proceed with modeling the table, an exercise left to the "student".
Sometimes, you don't have dimensions to work from and will need to come up with some sort of "yardstick". There are number of publications you can find that show standard dimensions of typical furniture and the human body. Below, you will find a section of the painting "The Roman Potter" by Alma-Tadema. The goal was to model the tray the potter is carrying. In this case, his arm appears to be parallel to the viewing plane and we can use it to properly scale the image. And, since the end of the tray also appears to be in the same plane, perspective issues can be ignored. I measured from my wrist to elbow and came up with a bit more than 11 inches. Then, I scaled the image so the potter's arm was 11.1" and dimensioned all the interesting features as shown below.

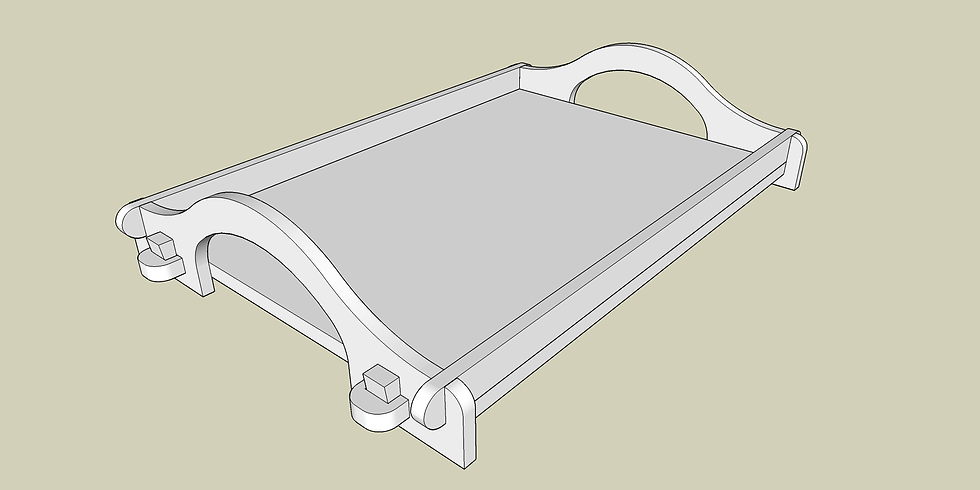
Once done, I normalized the dimensions and modeled the tray. I made a change to the inside of the tray - 18" x 12" - which causes the overall dimensions to be a bit smaller. I also deviated a bit from the painting in order to make it lighter (in weight and look), including using thinner wood.


Comments